 从南图借的这本书,已经拖了好几个月没有读完了,加紧阅读和学习一下!前面3章的笔记记在了纸上,如果有可能拍照记录一下,后面还是电子记录下,纸质的不方便和保存和查阅,也不方便分享。书的配套代码,来自异步社区:https://box.lenovo.com/l/o5OgDR
第1章 Python脚本编程概述
第2章 调试和分析Python脚本程序
第3章 单元测试框架简介
第4章 自动化常规管理活动
4.6 读取配置文件
ConfigParser模块,用于读取配置文件
4.7 向脚本添加日志记录和警告代码
logging模块用于跟踪程序中发生的事件,warnings模块用于警告程序员关于语言和程序库中所做的更改。
import logging
import warnings

logging.basicConfig(level=logging.INFO,)
warnings.warn('This warning is not sent to the logs')
logging.captureWarnings(True)
warnings.warn('This warning is sent to the logs')

# 生成警告
# 简单过滤,可以将警告视为错误
warnings.simplefilter('error', UserWarning)
print('Before')
warnings.warn('Write your warning message here')
print('After')
4.8 限制CPU和内存的使用
resource模块里的sterlimit()函数来限制CPU
import resource
import sys
import signal
import time
def time_expired(n, stack):
 print('EXPIRED :', time.ctime())
 raise SystemExit('(time ran out)')
signal.signal(signal.SIGXCPU, time_expired)
# Adjust the CPU time limit
soft, hard = resource.getrlimit(resource.RLIMIT_CPU)
print('Soft limit starts as  :', soft)
resource.setrlimit(resource.RLIMIT_CPU, (10, hard))
soft, hard = resource.getrlimit(resource.RLIMIT_CPU)
print('Soft limit changed to :', soft)
print()
# Consume some CPU time in a pointless exercise
print('Starting:', time.ctime())
for i in range(200000):
 for i in range(200000):
  v = i * i
# We should never make it this far
print('Exiting :', time.ctime())
4.9 启动网页浏览器
webbrowser模块,-n 新窗口,-t 新的标签页
import webbrowser
webbrowser.open('https://timesofindia.indiatimes.com/world')
# 命令行直接使用,没有安装即可,应该是自带的模块
python -m webbrowser -t https://www.zd200572.com
4.10 OS模块处理目录和文件
直接看最简单的代码啦!
4.10.1 创建与删除文件目录
import os
directory_name = 'abcd'
print('Creating', directory_name)
# 创建文件夹
os.makedirs(directory_name)
file_name = os.path.join(directory_name, 'sample_example.txt')
print('Creating', file_name)
# 写入文件
with open(file_name, 'wt') as f:
 f.write('sample example file')
print('Cleaning up')
# 删除文件
os.unlink(file_name)
os.rmdir(directory_name)
mkdirs() # 创建所有目录,理解下来应该是mkdir -p一样的。
4.10.2 检测文件系统的内容
list.dir()函数,这章的模块基本是免安装的python自带的。
import os
import sys
print(sorted(os.listdir(sys.argv[1])))
4.11 rsync备份
sh库,助你在Python中轻松调用自己的程序的模块,第一次见,可以和os.system()运行一样的效果吧!
import os
import shutil
import time
from sh import rsync
def check_dir(os_dir):
 if not os.path.exists(os_dir):
  print (os_dir, "does not exist.")
  exit(1)
def ask_for_confirm():
 ans = input("Do you want to Continue? yes/non")
 global con_exit
 if ans == 'yes':
  con_exit = 0
  return con_exit
 elif ans == "no":
  con_exit = 1
  return con_exit
 else:
  print ("Answer with yes or no.")
  ask_for_confirm()
def delete_files(ending):
 for r, d, f in os.walk(backup_dir):
  for files in f:
   if files.endswith("." + ending):
    os.remove(os.path.join(r, files))
backup_dir = input("Enter directory to backupn") # Enter directory name
check_dir(backup_dir)
print (backup_dir, "saved.")
time.sleep(3)
backup_to_dir= input("Where to backup?n")
check_dir(backup_to_dir)
print ("Doing the backup now!")
ask_for_confirm()
if con_exit == 1:
 print ("Aborting the backup process!")
 exit(1)
rsync("-auhv", "--delete", "--exclude=lost+found", "--exclude=/sys", "--exclude=/tmp", "--exclude=/proc",
  "--exclude=/mnt", "--exclude=/dev", "--exclude=/backup", backup_dir, backup_to_dir)
第5章 处理文件、目录和数据
os.getwd() # 获取当前目录os.chdir() # 更改目录os.listdir() # 列出文件和目录os.rename() # 重命名
5.2 复制、移动、重命名和删除文件
python内置的shutil模块
import shutil
import os

shutil.copyfile('hello.py', 'welcome.py')
print("Copy Successfuln")
shutil.move('/home/student/work/sample.txt', '/home/student/Desktop')
shutil.move('sample.bin', 'sample.txt')
# remove删除文件
os.remove('sample.txt')
print("File removed successfully")
# 删除文件夹
os.rmdir('work1')
print("Directory removed successfully")
5.3 使用路径
os.path().absname() 绝对路径+文件名os.path().dirname() 只路径os.path().basename() 只文件名os.path().exists() 存在?os.path().getsize() 大小os.path().isfile() 是否是一个文件os.path().isdir() 是否是一个目录
5.4 比较数据
pandas模块,需要安装pip3 install pandas核心代码就一条,s1.symmetric_difference(s2),直接给出差异。
import pandas as pd

df1 = pd.read_csv("student1.csv")
df2 = pd.read_csv("student2.csv")

s1 = set([ tuple(values) for values in df1.values.tolist()])
s2 = set([ tuple(values) for values in df2.values.tolist()])

s1.symmetric_difference(s2)

print (pd.DataFrame(list(s1.difference(s2))),'nn')
print (pd.DataFrame(list(s2.difference(s1))),'nn')
5.5 合并数据
还是pandas模块,pandas.concat()完成。
import pandas as pd

df1 = pd.read_csv("student1.csv")
df2 = pd.read_csv("student2.csv")

result = pd.concat([df1, df2])
print(result)
5.6 模式匹配文件和目录
glob模块
import glob

file_match = glob.glob('*.txt')
print(file_match)

file_match = glob.glob('[0-9].txt')
print(file_match)

file_match = glob.glob('**/*.txt', recursive=True)
print(file_match)

file_match = glob.glob('**/', recursive=True)
print(file_match)
5.7 元数据:数据的数据
PyPDF模块,元数据是指数据的结构化信息,摘要,基本信息。.PdfFileReader()读取数据,.getDocumentInfo()获得元数据。
import pyPdf
def main():
 file_name = '/home/student/sample_pdf.pdf'
 pdfFile = pyPdf.PdfFileReader(file(file_name,'rb'))
 pdf_data = pdfFile.getDocumentInfo()
 print ("----Metadata of the file----")

 for md in pdf_data:
  print (md+ ":" +pdf_data[md])
if __name__ == '__main__':
 main()
5.8 压缩和解压
shutil的make_archive()函数,压缩目录中所有文件,觉得还是shell来得快呢!unpack_archive()函数解压。
from shutil import make_archive,unpack_archive
import os
archive_name = os.path.expanduser(os.path.join('~', 'work1'))
root_dir = os.path.expanduser(os.path.join('~', '.ssh'))
make_archive(archive_name, 'gztar', root_dir)
shutil.unpack_archive('work1.zip')
5.9 使用tarfile模块创建和查看TAR文件
上面是zip,下面是gzip和bz2文件。
import tarfile

tar_file = tarfile.open("work.tar.gz", "w:gz")
for name in ["welcome.py", "hello.py", "hello.txt", "sample.txt", "sample1.txt"]:
 tar_file.add(name)
tar_file.close()
tar_file = tarfile.open("work.tar.gz", "r:gz")
print(tar_file.getnames())
第6章 文件归档、加密和解密
这一章的内容和上一章多有重复呢,这里只记录独有的内容啦!extractall()函数可以从归档文件中提取内容
import tarfile
import os

os.mkdir('work')
with tarfile.open('work.tar', 'r') as t:
 t.extractall('work')
print(os.listdir('work'))
tarfile模块的getmembers函数,可以获取文件元数据。这里的format用法,我不经常用,一般使用split(),看来也要学看成用一下呢!检查是否是zip文件
import zipfile

for f_name in ['hello.py', 'work.zip', 'welcome.py', 'sample.txt', 'test.zip']:
 try:
  print('{:} {}'.format(f_name, zipfile.is_zipfile(f_name)))
 except IOError as err:
  print('{:} {}'.format(f_name, err))
查看操作系统.infolist()
import zipfile
def meta_info(names):
 with zipfile.ZipFile(names) as zf:
  for info in zf.infolist():
   print(info.filename)
   if info.create_system == 0:
    system = 'Windows'
   elif info.create_system == 3:
    system = 'Unix'
   else:
    system = 'UNKNOWN'
   print("System         :", system)
   print("Zip Version    :", info.create_version)
   print("Compressed     :", info.compress_size, 'bytes')
   print("Uncompressed   :", info.file_size, 'bytes')
   print()


if __name__ == '__main__':
 meta_info('work.zip')
文件加密与解密
pyAesCrypt模块,需要安装下再使用,AES256-CBC加/解密文件。这部分内容不是太熟悉,不过我觉得文件的操作如果不是考虑代码的连续性可以使用shell进行估计更高效些。有设置缓冲区大小和密码,应该是加密所需的内容。encryptStream和decryptStream两个函数实现。
# 加密
import pyAesCrypt
from os import stat, remove
# encryption/decryption buffer size - 64K
bufferSize = 64 * 1024
password = "#Training"

# encrypt
with open("sample.txt", "rb") as fIn:
 with open("sample.txt.aes", "wb") as fOut:
  pyAesCrypt.encryptStream(fIn, fOut, password, bufferSize)

# get encrypted file size
encFileSize = stat("sample.txt.aes").st_size


# 解密
import pyAesCrypt
from os import stat, remove

bufferSize = 64 * 1024
password = "#Training"

encFileSize = stat("sample.txt.aes").st_size

with open("sample.txt.aes", "rb") as fIn:
 with open("sampleout.txt", "wb") as fOut:
  try:
   pyAesCrypt.decryptStream(fIn, fOut, password, bufferSize, encFileSize)
  except ValueError:
   remove("sampleout.txt")
第7章 文本处理和正则表达式
7.1 文本包装
textwrap模块,提供TextWrapper类,用于格式化和包装文本,主要有5个函数wrap(), fill(), dedent(), indent(), shorten()。
7.1.1 wrap()
将整个文本段落包装到单个字符串,输出由行组成的列表。感觉比较适合fasta格式这种,60字符一行。
sample_string = '''Python is an interpreted high-level programming language for
general-purpose programming. Created by Guido van Rossum and first released in 			1991, Python has a design philosophy that emphasizes code readability,
notably using significant whitespace.'''

w = textwrap.wrap(text=sample_string, width=30)
print(w)
7.1.2 fill()函数
与wrap()类似,但返回字符串而不是列表。
7.1.3 dedent()函数
将每一行的前导空格删除。
7.1.4 indent()函数
添加指定前辍到选定行的开头,
7.1.5 shorten()函数
按指定宽度截取文本,摘要,所有连续空格变为单个空格。
7.2 正则表达式
re模块,这里不是太陌生,就不一一记录了。f换页,r回车。
-
re.IGNORECASE # 不管大小写 -
re.DOTALL # 包含新行的任何字符 -
re.MULTILINE # 匹配多行 -
re,ASCII # 仅对ASCII字符转义匹配 -
re.match().group() # 返回整个匹配项 -
re.match().groups() #元组形式返回分组匹配项 -
re.search() #查找 -
re.findall() # 查找所有 -
re.sub() # 替换
7.3 Unicode字符串
ord()内置函数,用于获取给定字符的Unicode代码点。P.S.新知识呀!避免UnicodeDecodeError,将replace、blackslashreplace或ignore作为decode的error参数。str.decode('utf-8', "replace")
第8章 文档和报告
8.2 字符串标准化
一种是使用format()方法,另一种是使用%运算符。
# Using multiple formatters
str2 = "This is Mary {}. I work at {} Resource department. I am {} years old !!"
print(str2.format("Jacobs", "Human", 30))
-
%d 十进制整数 -
%s 字符串 -
%f 符点数 -
%c 字符
# aligning
name = 'Mary'
print("Normal: Hello, I am %s !!" % name)
print("Right aligned: Hello, I am %10s !!" % name)
print("Left aligned: Hello, I am %-10s !!" % name)
print()
# truncating
print("The truncated string is %.4s" % ('Examination'))
print()
# 格式化占位符
# formatting placeholders
students = {'Name' : 'John', 'Address' : 'New York'}
print("Student details: Name:%(Name)s Address:%(Address)s" % students)
以下是运行结果,有意思的是python2的运行结果和3差别很大呢,以下是Ptyhon3的结果:
Normal: Hello, I am Mary !!
Right aligned: Hello, I am       Mary !!
Left aligned: Hello, I am Mary       !!

The truncated string is Exam

Student details: Name:John Address:New York
8.3 发送电子邮件
这个应该是之前用过的,现在如果不用授权码,应该是不能使用这种工具发邮件了的,当然安全级别低的邮箱可能还是可以的。
import os
import smtplib
from email.mime.text import MIMEText
from email.mime.image import MIMEImage
from email.mime.multipart import MIMEMultipart
import getpass

host_name = 'smtp.gmail.com'  # smtp.mail.yahoo.com
port = 465
u_name = 'mansi.joshi990@gmail.com'
password = getpass.getpass()
sender = 'Mansi Joshi'
receivers = ['info@levanatech.com', 'kalpesh7402patil@gmail.com']

text = MIMEMultipart()
text['Subject'] = 'Test Attachment'
text['From'] = sender
text['To'] = ', '.join(receivers)

txt = MIMEText('Sending a sample image.')
text.attach(txt)

f_path = '/home/student/Desktop/mountain.jpg'
with open(f_path, 'rb') as f:
    img = MIMEImage(f.read())

img.add_header('Content-Disposition',
               'attachment',
               filename=os.path.basename(f_path))
text.attach(img)

server = smtplib.SMTP_SSL(host_name, port)
print("Attachment sent successfully !!")
server.login(u_name, password)
server.sendmail(sender, receivers, text.as_string())
server.quit()
第9章 处理不同类型的文件
9.1 处理PDF文件
PyPDF2模块,是第三方模块。
# 获取pdf页数
import PyPDF2

pdf = open('test.pdf', 'rb')
read_pdf = PyPDF2.PdfFileReader(pdf)

print("Number of pages in pdf : ", read_pdf.numPages)
pdf.close()
# 提取文本
import PyPDF2

pdf = open('test.pdf', 'rb')
read_pdf = PyPDF2.PdfFileReader(pdf)
pdf_page = read_pdf.getPage(1)
pdf_content = pdf_page.extractText()
print(pdf_content)
pdf.close()
# 旋转pdf
import PyPDF2

pdf = open('test.pdf', 'rb')
rd_pdf = PyPDF2.PdfFileReader(pdf)
wr_pdf = PyPDF2.PdfFileWriter()

for pg_num in range(rd_pdf.numPages):
 pdf_page = rd_pdf.getPage(pg_num)
 pdf_page.rotateClockwise(90)
 wr_pdf.addPage(pdf_page)

pdf_out = open('rotated.pdf', 'wb')
wr_pdf.write(pdf_out)
pdf_out.close()
print("pdf successfully rotated")
pdf.close()
9.2 处理EXcel
处理.xlxs文件有3个模块,xlrd、pandas、openpyxl,下面分别使用下。
xlrd模块
# 读取
import xlrd

excel_file = ("/home/student/sample.xlsx")

book_obj = xlrd.open_workbook(excel_file)
excel_sheet = book_obj.sheet_by_index(0)

result = excel_sheet.cell_value(0, 1)
print(result)
# 读取列名
excel_file = ("/home/student/work/sample.xlsx")

book_obj = xlrd.open_workbook(excel_file)
excel_sheet = book_obj.sheet_by_index(0)
excel_sheet.cell_value(0, 0)

for i in range(excel_sheet.ncols):
 print(excel_sheet.cell_value(0, i))
Pandas模块
一个大名鼎鼎的第三方模块,当然需要安装啦!这里配套文件没有这段代码,手打下了,同时加强学习!
# 起个模块别名
import pandas as pd

excel_file = 'sample.xlxs'
cols = [1, 2, 3]
df = pd.read_excel(excel_file, sheet_names='sheet1', usecols=cols)

print(df.head)
定义了cols并将列索引放入其中。
使用openpyxl模块
同样是个第三方模块。
from openpyxl import Workbook

book_obj = Workbook()
# 创建文件
excel_sheet = book_obj.active
excel_sheet['A1'] = 'Name'
excel_sheet['A2'] = 'student'
excel_sheet['B1'] = 'age'
excel_sheet['B2'] = '24'

book_obj.save("test.xlsx")
print("Excel created successfully")
# 添加若干值
rows = (
    (11, 12, 13),
    (21, 22, 23),
    (31, 32, 33),
    (41, 42, 43)
)

for values in rows:
 excel_sheet.append(values)
 print()

print("values are successfully appended")
book_obj.save('test.xlsx')
# 读取多个单元格,另外也可以合并和拆分单元格,这里有点意思,不是太理解呢。看下来应该是占位符,多少个空格,只是为了整齐好看吧。
cells = excel_sheet['A1': 'C6']

for c1, c2, c3 in cells:
 print("{0:6} {1:6} {2:6}".format(c1.value, c2.value, c3.value))
##9.3 处理csv文件 csv是内置模块,直接使用
# 读取
import csv

csv_file = open('test.csv', 'r')
with csv_file:
read_csv = csv.reader(csv_file)
     for row in read_csv:
        print(row)
# 写入
write_csv = [['Name', 'Sport'], ['Andres Iniesta', 'Football'], ['AB de Villiers', 'Cricket'], ['Virat Kohli', 'Cricket'], ['Lionel Messi', 'Football']]

with open('csv_write.csv', 'w') as csvFile:
writer = csv.writer(csvFile)
     writer.writerows(write_csv)
 print(write_csv)
9.4 处理文本文件
三种模式,a读,a+读写,w,r,带加号的是读写一起,凡是写的,如果文件不存在就创建。
# 读
text_file = open("test.txt", "r")
data = text_file.read()
print(data)
text_file.close()
#  写
text_file = open("test.txt", "w")
text_file.write("MondaynTuesdaynWednesdaynThursdaynFridaynSaturdayn")
text_file.close()
第10章 网络基础——套接字编程
套接字socket,是通信的接口,包括本地通信和互联网通信。##套接字 这章的大部分内容涉及了计算机基础,OSI模型这种。可能这方面对我们非计算机专业的有点难懂,还是了解一下。
# 客户端的代码
import socket

host = socket.gethostname()  # as both code is running on same pc
port = 5000  # socket server port number

client_socket = socket.socket()  # instantiate
client_socket.connect((host, port))  # connect to the server

message = input(" -> ")  # take input

while message.lower().strip() != 'bye':
 client_socket.send(message.encode())  # send message
 data = client_socket.recv(1024).decode()  # receive response

 print('Received from server: ' + data)  # show in terminal

 message = input(" -> ")  # again take input

client_socket.close()  # close the connection
# 服务器端的代码
import socket

# get the hostname
host = socket.gethostname()
port = 5000  # initiate port no above 1024

server_socket = socket.socket()  # get instance
# look closely. The bind() function takes tuple as argument
server_socket.bind((host, port))  # bind host address and port together

# configure how many client the server can listen simultaneously
server_socket.listen(2)
conn, address = server_socket.accept()  # accept new connection
print("Connection from: " + str(address))
while True:
 # receive data stream. it won't accept data packet greater than 1024 bytes
 data = conn.recv(1024).decode()
 if not data:
  # if data is not received break
  break
 print("from connected user: " + str(data))
 data = input(' -> ')
 conn.send(data.encode())  # send data to the client

conn.close()  # close the connection
## http程序包
两种客户端请求方式,GET和POST。
# 客户端
import http.client

con_obj = http.client.HTTPConnection('www.levanatech.com', 80, timeout=100)
print(con_obj)
# GET
con_obj = http.client.HTTPSConnection("www.imdb.com")
con_obj.request("GET", "/")
response = con_obj.getresponse()
print("Status: {}".format(response.status))

read_data = response.read(1000)
print(read_data)
con_obj.close()
#POST 发送数据
import json

con_obj = http.client.HTTPSConnection('www.httpbin.org')

headers_list = {'Content-type': 'application/json'}

post_text = {'text': 'Hello World !!'}
json_data = json.dumps(post_text)

con_obj.request('POST', '/post', json_data, headers_list)

response = con_obj.getresponse()
print(response.read().decode())
http.server模块,两个方法,GET和HEAD
python3 -m http.server 9000 # 端口号要>1024
10.3 ftplib模块
连接ftp服务器并下载文件,又get一个可以使用命令行ftp的方法,shell的ftp不怎么会用啦!
from ftplib import FTP

ftp = FTP('192.168.2.105')
ftp.login('student','training')

ftp.cwd('/home/student/work/')
files = ftp.nlst()

# Print out the files
for file in files:
 print("Downloading..." + file)
 ftp.retrbinary("RETR " + file ,open("/home/student/testing/" + file, 'wb').write)

# 获取欢迎信息
welcome_msg = ftp.getwelcome()
print(welcome_msg)

ftp.close()
# sendcmd()向ftp服务器发送命令
ftp.cwd('/home/student/')
s_cmd_stat = ftp.sendcmd('STAT')
print(s_cmd_stat)
print()
s_cmd_pwd = ftp.sendcmd('PWD')
print(s_cmd_pwd)
print()

ftp.close()
10.4 urllib程序包
获取html文件
import urllib.request
x = urllib.request.urlopen('https://www.imdb.com/')
print(x.read())
# 响应头
x = urllib.request.urlopen('https://www.imdb.com/')
print(x.info())
第11章 使用Python脚本处理电子邮件
前面部分内容和第8章有所重复,这里略过。
11.3 POP3和IMAP服务器
这个用python操作是第一次接触呢!我们的邮箱客户端一般是这个原理,据说华为也推出了花瓣邮箱客户端,现在使用的是qq邮箱和网易邮箱大师,期待不一样的体验。
# 查看电子邮件数量
import poplib
import getpass

pop3_server = 'pop.gmail.com'
username = 'Emaild_address'
password = getpass.getpass()

email_obj = poplib.POP3_SSL(pop3_server)
print(email_obj.getwelcome())
email_obj.user(username)
email_obj.pass_(password)
email_stat = email_obj.stat()

print("New arrived e-Mails are : %s (%s bytes)" % email_stat)

# 获取最新电子邮件
print("nLatest Mailn")
latest_email = email_obj.retr(1)
print(latest_email[1])
# 获取所有电子邮件
NumofMsgs = email_stat[0]
for i in range(NumofMsgs):
 for mail in email_obj.retr(i+1)[1]:
  print(mail)
下面只是协议和用的模块不同啦,一般邮箱两者都支持的。
# imaplib模块接收电子邮件
import imaplib
import pprint

imap_server = 'imap.gmail.com'
username = 'Emaild_address'
password = getpass.getpass()

imap_obj = imaplib.IMAP4_SSL(imap_server)
imap_obj.login(username, password)
imap_obj.select('Inbox')
temp, data_obj = imap_obj.search(None, 'ALL')
for data in data_obj[0].split():
 temp, data_obj = imap_obj.fetch(data, '(RFC822)')
 print('Message: {0}n'.format(data))
 pprint.pprint(data_obj[0][1])
 break
imap_obj.close()
第12章 通过Telnet和SSH远程控制主机
12.1 telnetlib模块
这个是接触的比较少的,一般就ssh了,其基于tcp,默认端口23,一般telnet ip即可使用。示例代码还有点长,telnet是明文传输的,已经淘汰,升级为了ssh,原来这个我们用的少。据说这个协议是极致安全的openbsd操作系统首创的。所以,以下代码应该可以略过了。
import telnetlib
import getpass
import sys

HOST_IP = "your host ip address"
host_user = input("Enter your telnet username: ")
password = getpass.getpass()

t = telnetlib.Telnet(HOST_IP)
t.read_until(b"Username:")
t.write(host_user.encode("ascii") + b"n")
if password:
 t.read_until(b"Password:")
 t.write(password.encode("ascii") + b"n")

t.write(b"enablen")
t.write(b"enter_remote_device_passwordn") #password of your remote device
t.write(b"conf tn")
t.write(b"int loop 1n")
t.write(b"ip add 10.1.1.1 255.255.255.255n")
t.write(b"int loop 2n")
t.write(b"ip add 20.2.2.2 255.255.255.255n")
t.write(b"endn")
t.write(b"exitn")
print(t.read_all().decode("ascii") )
SSH
这个相比telnet是加密的,下面是4个不同的模块来实现,好像孔乙已茴香豆的茴字有几种写法的感觉,这是赤裸裸的炫耀呀!
subprocess模块
Popen类用于创建和管理进程,子程序将在新进程中执行完成,类unix系统中执行子程序,os.eecvp()函数;windows中,CreateProcess()函数。看起来,这个类的参数挺复杂的,不过,示例程序用到的可能不多,于是,就几行搞定了。不过好像还是有点不明所以,加强学习!
import subprocess
import sys

HOST="your host username@host ip"
COMMAND= "ls"

ssh_obj = subprocess.Popen(["ssh", "%s" % HOST, COMMAND],
                       shell=False,
                       stdout=subprocess.PIPE,
                       stderr=subprocess.PIPE)

result = ssh_obj.stdout.readlines()
if result == []:
    err = ssh_obj.stderr.readlines()
    print(sys.stderr, "ERROR: %s" % err)
else:
    print(result)
fabric模块
第三方模块,需要安装下。fab命令也可以执行一些任务,不在示例程序中。
from fabric.api import *

env.hosts=["host_name@host_ip"]
env.password='your password'

def dir():
    run('mkdir fabric')
    print('Directory named fabric has been created on your host network')

def diskspace():
    run('df')

def check():
    host_type()
paramiko模块
同样需要安装后使用,支持基于密钥验证。
import paramiko
import time

ip_address = "host_ip_address"
usr = "host_username"
pwd = "host_password"

c = paramiko.SSHClient()
c.set_missing_host_key_policy(paramiko.AutoAddPolicy())
c.connect(hostname=ip_address,username=usr,password=pwd)

print("SSH connection is successfuly established with ", ip_address)

rc = c.invoke_shell()
for n in range (2,6):
    print("Creating VLAN " + str(n))
    rc.send("vlan databasen")
    rc.send("vlan " + str(n) +  "n")
    rc.send("exitn")
    time.sleep(0.5)

time.sleep(1)
output = rc.recv(65535)
print(output)
c.close
netmiko模块
是上面模块的进阶版本,简化了操作?感觉更复杂了呢,前段时间还接触了一个叫ansible的模块,运维用的多些,可能比这几个更好用呢!
from netmiko import ConnectHandler

remote_device={
    'device_type': 'cisco_ios',
    'ip':  'your remote_device ip address',
    'username': 'username',
    'password': 'password',
}

remote_connection = ConnectHandler(**remote_device)
#net_connect.find_prompt()

for n in range (2,6):
      print("Creating VLAN " + str(n))
      commands = ['exit','vlan database','vlan ' + str(n), 'exit']
      output = remote_connection.send_config_set(commands)
      print(output)

command = remote_connection.send_command('show vlan-switch brief')
print(command)
第13章 创建图形用户界面
13.1 GUI简介
GUI,有多种python库可以实现,本章使用PyQt5。PyQt5组件有:window(窗口)、button(按钮)、textbox(文本输入)、label(单行文本或图像)、combo box(组合按钮和弹出列表)、check box(可以取消或选中的选项按钮)、 radio button(单选,同上)、message box(信息)、menu(显示选项)、table(标准表)、signals/slots(调用反应/函数)、layouts(多个控件)。PyQt5类有:QtGui(事件、图形等处理类)、QtWidgets(桌面式界面类)、QtCore(非GUI核心功能类)、Qtblueteeth(连接设备、交互类)、QtPositioning(确定位置类)、QtMultimedia(多媒体类)、QtNetwork(网络编程类)、QtWebkit(浏览器类)、QtXml(XML文件类)、QtSql(数据库类)。
使用程序库创建基于GUI的应用程序
 一个简单的Hello World!界面啦!
import sys
from PyQt5.QtWidgets import QApplication, QLabel, QPushButton, QWidget
from PyQt5.QtCore import pyqtSlot
from PyQt5.QtGui import QIcon

class simple_app(QWidget):

 def __init__(self):
  super().__init__()
  self.title = 'Main app window'
  self.left = 20
  self.top = 20
  self.height = 300
  self.width = 400
  self.app_initialize()


 def app_initialize(self):
  self.setWindowTitle(self.title)
  self.setGeometry(self.left, self.top, self.height, self.width)
  b = QPushButton('Click', self)
  b.setToolTip('Click on the button !!')
  b.move(100,70)
  self.l = QLabel(self)
  self.l.resize(100,50)
  self.l.move(100,200)
  b.clicked.connect(self.on_click)
  self.show()

 @pyqtSlot()
 def on_click(self):
  self.l.setText("Hello World")

if __name__ == '__main__':
 appl = QApplication(sys.argv)
 ex = simple_app()
 sys.exit(appl.exec_())
创建两个按钮
from PyQt5.QtWidgets import QApplication, QWidget, QPushButton, QVBoxLayout

appl = QApplication([])

make_window = QWidget()
l = QVBoxLayout()

l.addWidget(QPushButton('Button 1'))
l.addWidget(QPushButton('Button 2'))

make_window.setLayout(l)
make_window.show()

appl.exec_()
这属于最基本的了解和入门啦,一本书如果涉及的知识方面多,往往就只能像这样简单提及了,毕竟,师傅领进门,修行在个人呀!
第14章 使用Apache及其他类型的日志文件
14.1 安装并下载http Logs Viewer程序
只有windows版本,linux/mac需要用wine,下面是Mac版本的安装:
#  先安装homebrew
brew install winetricks
bash winetricks -q dotnet40 corefonts
wine httpLogsView.exe
算了,mac总是失败,还是老老实实windows吧!
14.2 解析复杂日志文件
解析IP地址正则表达式解决的,collections模块,代替python内置数据类型。
mport re
from collections import Counter

r_e = r'd{1,3}.d{1,3}.d{1,3}.d{1}'

with open("access.log") as f:
 print("Reading Apache log file")
 Apache_log = f.read()
 get_ip = re.findall(r_e,Apache_log)
 no_of_ip = Counter(get_ip)
 for k, v in no_of_ip.items():
  print("Available IP Address in log file " + "=> " + str(k) + " " + "Count "  + "=> " + str(v))
14.3 异常机制
try…except
14.4 解析不同文件的技巧
14.5 错误日志
14.6 访问日志
通用日志格式
LogFormat "%h %l %u %t "%r" %>s %b" common
CustomLog logs/access_log common
-
%h:IP地址 -
%l :identity? -
%u:客户标识 %t :时间 -
“%r” :客户端发出的包含许多有用信息的请求行 -
%>s:客户端的状态码 -
%b:返回给客户端的不包括响应头的字节数
14.7 解析其他日志文件
在/var/log中的其他日志,比如下面的内核日志:
f=open('/var/log/kern.log','r')
lines = f.readlines()
for line in lines:
 kern_log = line.split()
 print(kern_log)
第15章 SOAP和RESTful API通信
15.1 SOAP是什么
简单对象访问协议,允许程序进程使用不同操作系统的标准通信协议,基于xml,也是一种web服务。python的SOAP程序库有SOAPpy, Zeep, ladon, suds-jurko, pysimplesoap, 这里只学习Zeep库,第三方库,同样要安装。Zeep库用于wsdl文档,,会生成服务和文档代码。
import zeep

w = 'http://www.soapclient.com/xml/soapresponder.wsdl'
c = zeep.Client(wsdl=w)
print(c.service.Method1('Hello', 'World'))
还是有些不明所以的感觉。
15.2 RESTful API是什么
表述性状态传递,用于Web服务开发的通信方式,占用带宽少,适合网络通信。requests和json模块。
import requests
import json

req = requests.get('https://www.imdb.com/news/top?ref_=nv_tp_nw')
print(req)

url_name = 'http://httpbin.org/post'
data = {"Name" : "John"}
data_json = json.dumps(data)
h = {'Content-type': 'application/json'}

res_obj = requests.post(url_name, data=data_json, headers=h)
print(res_obj)
15.3 处理JSON数据
json即对象简谱,是一种数据交换模格式。
-
json.dump(obj, dileObj):将python对象序列转化为json格式的流 -
json.dumps(obj):将python对象序列转化为json格式的流的字符串 -
json.load(JSONfile):json文件反序列化为python对象 -
json.loads(JSONfile):字符串类型json转化为Python对象 -
JSONEncoder和JSONDecoder用于编码和解码的类
# json to python
import json

j_obj =  '{ "Name":"Harry", "Age":26, "Department":"HR"}'

p_obj = json.loads(j_obj)

print(p_obj)
print(p_obj["Name"])
print(p_obj["Department"])

# python to json
import json

emp_dict1 =  '{ "Name":"Harry", "Age":26, "Department":"HR"}'

json_obj = json.dumps(emp_dict1)

print(json_obj)
** python对象to json**
import json

python_dict =  {"Name": "Harry", "Age": 26}
python_list =  ["Mumbai", "Pune"]
python_tuple =  ("Basketball", "Cricket")
python_str =  ("hello_world")
python_int =  (150)
python_float =  (59.66)
python_T =  (True)
python_F =  (False)
python_N =  (None)

json_obj = json.dumps(python_dict)
json_arr1 = json.dumps(python_list)
json_arr2 = json.dumps(python_tuple)
json_str = json.dumps(python_str)
json_num1 = json.dumps(python_int)
json_num2 = json.dumps(python_float)
json_t = json.dumps(python_T)
json_f = json.dumps(python_F)
json_n = json.dumps(python_N)

print("json object : ", json_obj)
print("jason array1 : ", json_arr1)
print("json array2 : ", json_arr2)
print("json string : ", json_str)
print("json number1 : ", json_num1)
print("json number2 : ", json_num2)
print("json true", json_t)
print("json false", json_f)
print("json null", json_n)
第16章 网络爬虫——从网站中提取有用的数据
这章用的是beautifulsoupy库,同样是需要安装的第三方库。
16.1 什么是网络爬虫?
从网站中提取数据的技术,将非结构化数据转化为结构化数据。
16.2 数据提取
requests库获取网页。GET请求的状态码
-
200:一切正常并返回结果 -
301:重定向 -
400:错误请求 -
401:未通过身份认证 -
403 :试图访问禁用资源 -
404:试图访问的资源在服务器上不可用beautifulsoup4用于从网页中提取所需要的数据
import requests
from bs4 import BeautifulSoup

page_result = requests.get('https://www.imdb.com/news/top?ref_=nv_nw_tp')
parse_obj = BeautifulSoup(page_result.content, 'html.parser')

top_news = parse_obj.find(class_='news-article__content')ß
top_news_a_content = top_news.find_all('a')

print(top_news_a_content)
16.3 从维基百科抓取信息
基本上和前面的完全一样,还不算一个比较完整的脚本的感觉,不过入门可以了。
import requests
from bs4 import BeautifulSoup

page_result = requests.get('https://en.wikipedia.org/wiki/Portal:History')
parse_obj = BeautifulSoup(page_result.content, 'html.parser')

h_obj = parse_obj.find(class_='hlist noprint')
h_obj_a_content = h_obj.find_all('a')

print(h_obj)
print(h_obj_a_content)
第17章 统计信息的收集和报告
17.1 Numpy模块
需要安装的科学计算工具包。
import numpy as np

my_list1 = [1,2,3,4]
my_list2 = [11,22,33,44]

my_lists = [my_list1,my_list2]

my_array = np.array(my_lists)

print(my_array)

size = my_array.shape
print(size) #查看数组大小

data_type = my_array.dtype
print(data_type) # 数据类型
# 输出如下:
[[ 1  2  3  4]
 [11 22 33 44]]
(2, 4)
int64
np.zeros()函数创建全部为0的数组,同样np.ones()是全部为1的,np.ones((5,5)),5×5的全部为1的数组。np.eye()是单位矩阵数组,对角线上的值为1。np.arrange()创建一个数组。from __future__ import division用于处理浮点数。数组索引切片是原始数组的一部分,并将存储在另外的数组中。.copy()可以复制数组,就不会影响原始数组了。通用函数
import numpy as np

array = np.arange(16)
print("The Array is : ",array)

Square_root = np.sqrt(array)
print("Square root of given array is : ",Square_root)
17.2 Pandas模块
序列未声明索引
import pandas as pd
import numpy as np

s_data = pd.Series([10, 20, 30, 40], name = 'numbers')
print(s_data)
声明索引
import pandas as pd
import numpy as np

s_data = pd.Series([10, 20, 30, 40], index = ['a', 'b', 'c', 'd'], name = 'numbers')
print(s_data)
print()
print("The data at index 2 is: ", s_data[2])
print("The data from range 1 to 3 are:n", s_data[1:3])
数据帧
17.3 数据可视化
Matplotlib
import matplotlib.pyplot as plt
import numpy as np

x = np.linspace(0, 5, 10)
y = x**2
plt.plot(x,y)
plt.title("sample plot")
plt.xlabel("x axis")
plt.ylabel("y axis")
plt.show()
import matplotlib.pyplot as plt
from matplotlib import style

style.use('ggplot') #图形语法,R语言最闻名的包呀

x1 = [0,5,10]
y1 = [12,16,6]

x2 = [6,9,11]
y2 = [6,16,8]

plt.subplot(2,1,1)
plt.plot(x1, y1, linewidth=3)
plt.title("sample plot")
plt.xlabel("x axis")
plt.ylabel("y axis")

plt.subplot(2,1,2) #两个图排列 plt.figure()在不同的画布上显示两个图
plt.plot(x2, y2, color = 'r', linewidth=3)
plt.xlabel("x2 axis")
plt.ylabel("y2 axis")
plt.show()

import matplotlib.pyplot as plt
import matplotlib.image as mpimg
# 打开图片
plt.imshow(mpimg.imread('my_sample_plot1.jpg'))
plt.show()
 直方图
直方图
import matplotlib.pyplot as plt
import numpy as np

x = np.random.randn(500)
plt.hist(x)
plt.show()
 散点图
散点图
import matplotlib.pyplot as plt
import numpy as np

x = np.linspace(-2,2,100)
y = np.random.randn(100)
colors = np.random.rand(100)
plt.scatter(x,y,c=colors)
plt.show()
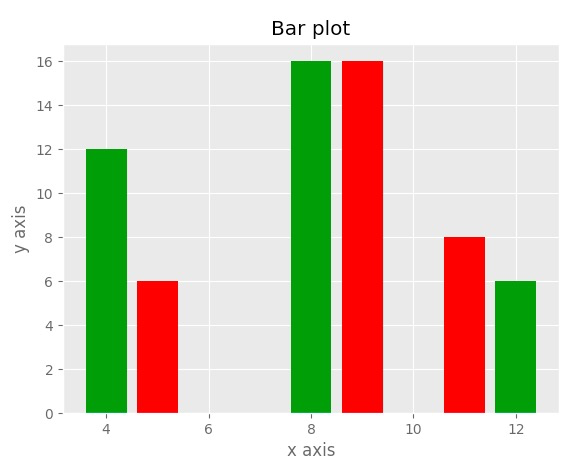
挺漂亮的图呀! 条形图
条形图
import matplotlib.pyplot as plt
from matplotlib import style

style.use('ggplot')

x1 = [4,8,12]
y1 = [12,16,6]

x2 = [5,9,11]
y2 = [6,16,8]

plt.bar(x1,y1,color = 'g',linewidth=3)
plt.bar(x2,y2,color = 'r',linewidth=3)

plt.title("Bar plot")
plt.xlabel("x axis")
plt.ylabel("y axis")

plt.show()
 Plotly另一个图形库,也可以在线使用,绘制后生成网页,网页的优势是可交互。
import random
import plotly
from numpy import *

N = 50

c = ['hsl('+str(h)+',50%'+',50%)' for h in linspace(0, 360, N)]

data_set = [{
    'y': 3.5*sin(pi * i/N) + i/N+(1.5+0.5*cos(pi*i/N))*random.rand(20),
    'type':'box',
    'marker':{'color': c[i]}
    } for i in range(int(N))]

layout = {'xaxis': {'showgrid':False,'zeroline':False, 'tickangle':45,'showticklabels':False},
          'yaxis': {'zeroline':False,'gridcolor':'white'},
          'paper_bgcolor': 'rgb(233,233,233)',
          'plot_bgcolor': 'rgb(233,233,233)',
          }

plotly.offline.plot(data_set)
觉得这图适合发表文章用,挺好看,配色再好点就完美啦! 等高线图同样相当酷的图,不过有点复杂看不懂代码。
from plotly import tools
import plotly
import plotly.graph_objs as go

trace0 = go.Contour(
    z=[[1, 2, 3, 4, 5, 6, 7, 8],
       [2, 4, 7, 12, 13, 14, 15, 16],
       [3, 1, 6, 11, 12, 13, 16, 17],
       [4, 2, 7, 7, 11, 14, 17, 18],
       [5, 3, 8, 8, 13, 15, 18, 19],
       [7, 4, 10, 9, 16, 18, 20, 19],
       [9, 10, 5, 27, 23, 21, 21, 21]],
     line=dict(smoothing=0),
)

trace1 = go.Contour(
    z=[[1, 2, 3, 4, 5, 6, 7, 8],
       [2, 4, 7, 12, 13, 14, 15, 16],
       [3, 1, 6, 11, 12, 13, 16, 17],
       [4, 2, 7, 7, 11, 14, 17, 18],
       [5, 3, 8, 8, 13, 15, 18, 19],
       [7, 4, 10, 9, 16, 18, 20, 19],
       [9, 10, 5, 27, 23, 21, 21, 21]],
     line=dict(smoothing=0.95),
)

data = tools.subplots.make_subplots(rows=1, cols=2,
                          subplot_titles=('Smoothing_not_applied', 'Smoothing_applied'))

data.append_trace(trace0, 1, 1)
data.append_trace(trace1, 1, 2)

plotly.offline.plot(data)

第18章 MySQL和SQLite数据库管理
18.1 MySQL数据库管理
python有多种MySQL数据库管理的模块,这里用的是MySQLdb。MySQL的安装就不表了,安装python模块,pip应该也是可以的。sudo apt install python3-mysqldb获取数据库版本号登陆并创建测试帐号
# 登陆数据库
mysql -u root -p
create database test;
 use test
# 建立测试帐号
create user 'test'@'localhost' identified by 'test123';
# 授予权限
grant all on test.* to 'test'@'localhost';
exit;
进入python脚本:
import MySQLdb as mdb
import sys

con_obj = mdb.connect('localhost', 'test_user', 'test123', 'test');

cur_obj = con_obj.cursor()
cur_obj.execute("SELECT VERSION()")

version = cur_obj.fetchone()

print ("Database version : %s " % version)

con_obj.close()
# Database version : 5.7.34-0ubuntu0.18.04.1
创建表并添加数据
import MySQLdb as mdb

con_obj = mdb.connect('localhost', 'test_user', 'test123', 'test')

with con_obj:

 cur_obj = con_obj.cursor()
 cur_obj.execute("DROP TABLE IF EXISTS books")
        # 这里是插入了个自增id
 cur_obj.execute("CREATE TABLE books(Id INT PRIMARY KEY AUTO_INCREMENT, Name VARCHAR(100))")
        # 插入数据
 cur_obj.execute("INSERT INTO books(Name) VALUES('Harry Potter')")
 cur_obj.execute("INSERT INTO books(Name) VALUES('Lord of the rings')")
 cur_obj.execute("INSERT INTO books(Name) VALUES('Murder on the Orient Express')")
 cur_obj.execute("INSERT INTO books(Name) VALUES('The adventures of Sherlock Holmes')")
 cur_obj.execute("INSERT INTO books(Name) VALUES('Death on the Nile')")

print("Table Created !!")
print("Data inserted Successfully !!")
# 运行结果如下:
python3 insert_mysql.py
insert_mysql.py:8: Warning: (1051, "Unknown table 'test.books'")
  cur_obj.execute("DROP TABLE IF EXISTS books")
Table Created !!
Data inserted Successfully !!
# 检索数据
with con_obj:
 cur_obj = con_obj.cursor()
 cur_obj.execute("SELECT * FROM books")

 records = cur_obj.fetchall()

 for r in records:
  print(r)
# 更新数据
cur_obj.execute("UPDATE books SET Name = 'Fantastic Beasts' WHERE Id = 1")

try:
 con_obj.commit()
except:
 con_obj.rollback()
# 删除数据
cur_obj.execute("DELETE FROM books WHERE Id = 5");

try:
 con_obj.commit()
except:
 con_obj.rollback()
18.2 SQLite数据库管理
据说这个数据库还有一个浪漫的故事,一个人的公司开发了这个软件,用在全世界所有的智能手机以及其他,股权全部是他妻子的。首先,建立数据库,这个就是一个文件。
# 首先,建立数据库,这个就是一个文件。
sqlite3 test.db
.quit # 退出
连接数据库
import sqlite3

con_obj = sqlite3.connect('test.db')
print ("Database connected successfully !!")
# 创建表
with con_obj:
 cur_obj = con_obj.cursor()

 cur_obj.execute("""CREATE TABLE books(title text, author text)""")
 print ("Table created")
# 插入数据
with con_obj:
 cur_obj = con_obj.cursor()

 cur_obj.execute("INSERT INTO books VALUES ('Pride and Prejudice', 'Jane Austen')")
 cur_obj.execute("INSERT INTO books VALUES ('Harry Potter', 'J.K Rowling')")
 cur_obj.execute("INSERT INTO books VALUES ('The Lord of the Rings', 'J. R. R. Tolkien')")
 cur_obj.execute("INSERT INTO books VALUES ('Murder on the Orient Express', 'Agatha Christie')")
 cur_obj.execute("INSERT INTO books VALUES ('A Study in Scarlet', 'Arthur Conan Doyle')")
 con_obj.commit()

print("Data inserted Successfully !!")
# 检索数据
cur_obj = con_obj.execute("SELECT title, author from books")
for row in cur_obj:
 print ("Title = ", row[0])
 print ("Author = ", row[1], "n")

con_obj.close()
# 更新数据
with con_obj:
 cur_obj = con_obj.cursor()
 sql = """
  UPDATE books
  SET author = 'John Smith'
  WHERE author = 'J.K Rowling'
  """
 cur_obj.execute(sql)
print("Data updated Successfully !!")
# 删除数据
with con_obj:
 cur_obj = con_obj.cursor()
 sql = """
  DELETE FROM books
  WHERE author = 'John Smith'
  """
 cur_obj.execute(sql)
print("Data deleted successfully !!")
基本上和mysql差不多的感觉。到此,拖了好久的这本书,终于翻完了。
扫描二维码
获取更多精彩
公众号

本篇文章来源于微信公众号: 微因